When you Optimize Website Content in cPanel, what you are doing is compressing some or all of your website files before they are sent across the internet. The visitor’s browser then decompresses and renders the files.
In this tutorial, Washahost will show you how to enable website optimization in cPanel and explain the different options.
When you enable compression, your files are compressed with gzip. This is a lossless data compression utility. Compressing files can significantly decrease website load times and increase overall performance.
As a website becomes larger, the benefits of optimization increase.
The better your website performs, the more favorably it is looked upon by search engines like Google. So in addition to creating a better experience for your visitors, speeding up your website will also help you gain higher Google search results ranking.
If you’re waiting for me to list a downside of compression, I’m sorry to disappoint but there isn’t one. In earlier days, the compression/decompression cycle added time to the file rendering.
Nowadays, the processing time has been dramatically decreased and is more than offset by the gain in overall transfer time.
In other words, it’s time to optimize website content. You’ve got nothing to lose and everything to gain.
To Optimize Website Content in cPanel
Log in to cPanel.
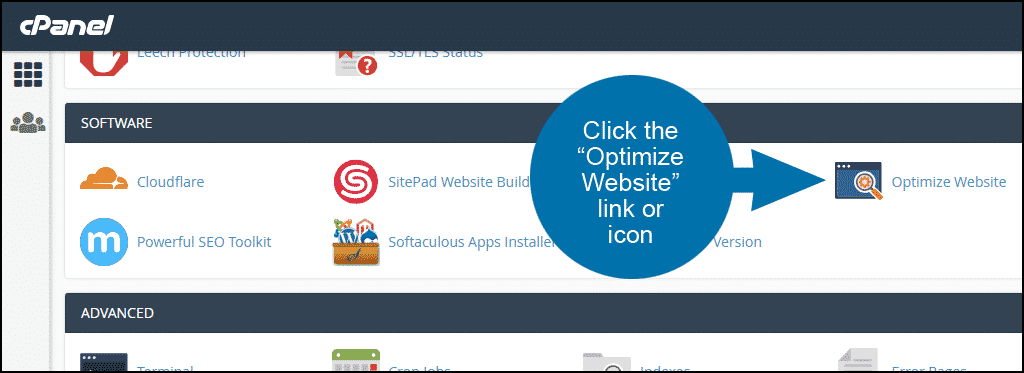
In the “Software” section, click the “Optimize Website” link or icon.
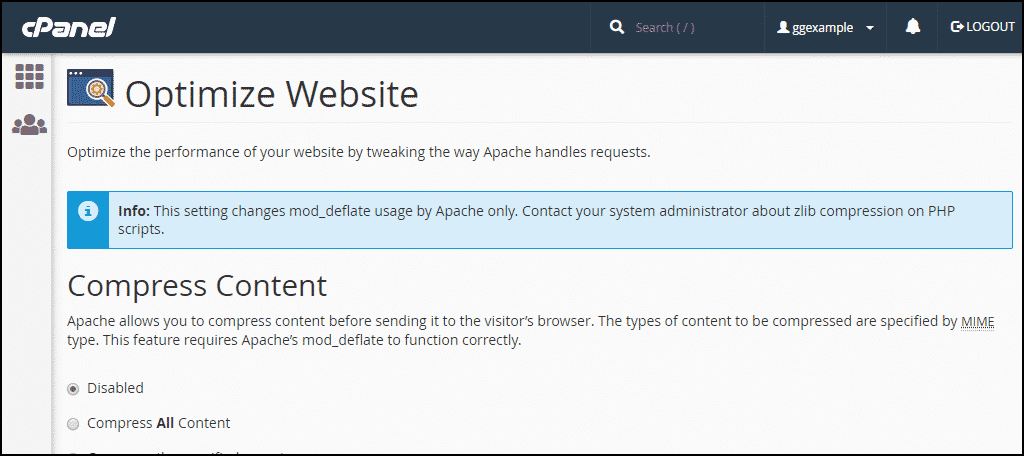
You may see an “info” box about zlib compression. If you do see the note and you want to compress .php files, contact Our live support team or open Ticket to see if zlib compression is available. If not, we may be able to enable it for you.
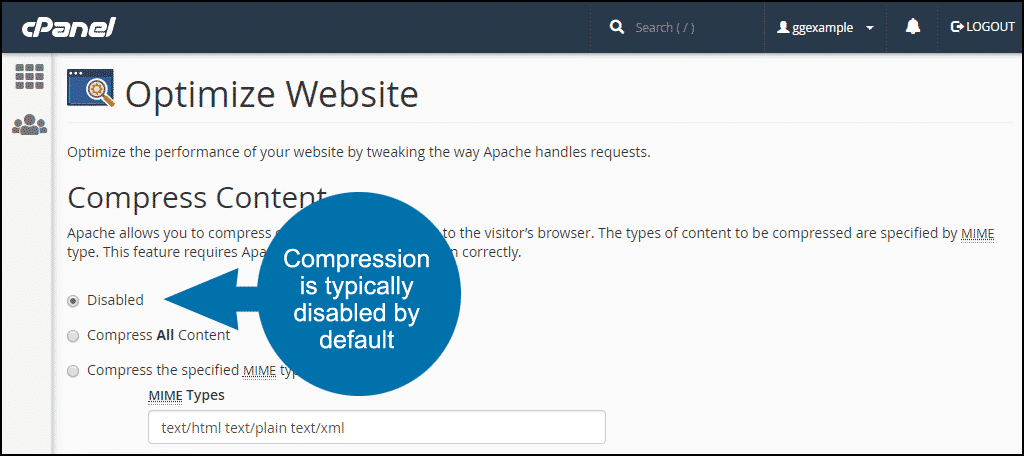
In the “Compress Content” section you have a few options. By default, the “Disabled” option is usually selected.
The easiest and quickest way to take advantage of compression and optimize website content is to choose to compress everything that can be compressed.
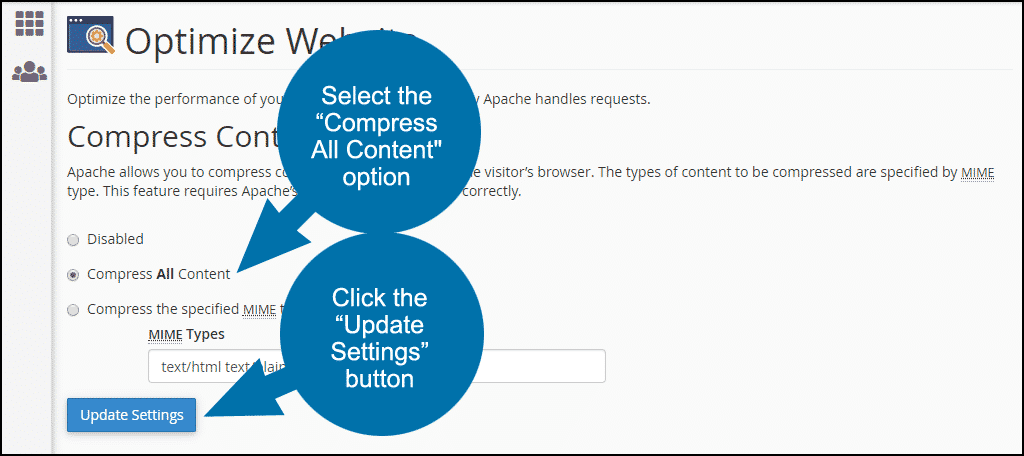
To do that, select the “Compress All Content” option and click the “Update Settings” button.
Compressing Specific MIME Types
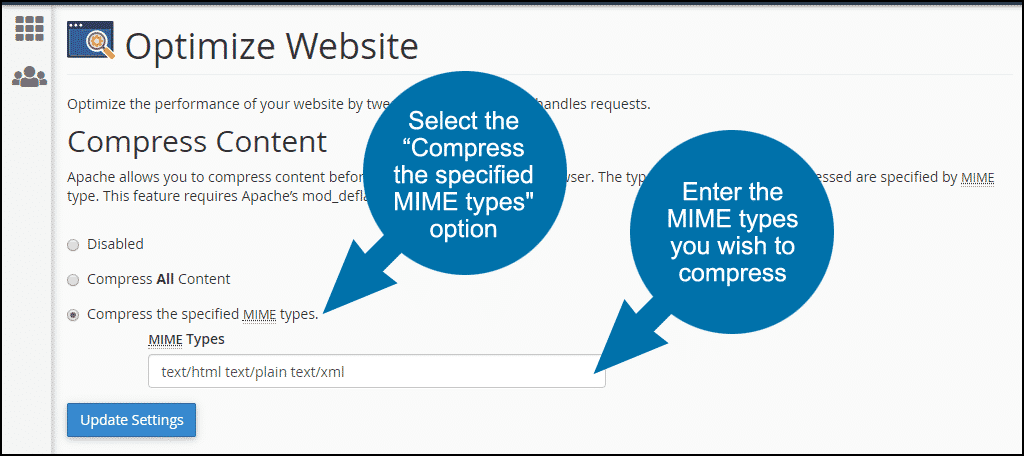
If you don’t want to compress all content, only specific types, select the “Compress the specified MIME types” option.
Every different kind of file used on your website has what’s called a MIME type.
For example, an HTML page is made up of text, so the MIME type is text/html. Your CSS file’s MIME type is text/css. A .json file is: application/json.
If you’re not sure of a MIME type for a file you use on your site, check the list from Mozilla.
You don’t have to enter most image types used on the web (i.e., .jpg and .png), as they are already compressed.
Enter the MIME types you wish to compress separated by a space.
The default entries are: text/html text/plain text/xml, and take note of the space separating each MIME type.
Click the “Update Settings” button.
How the “Compress Content” Tool Works
When you enable compression in cPanel, updates are made to the .htaccess file in the root or home directory of your site. If no .htaccess file is present, one will be created.
If you edit the .htaccess file yourself at some point in the future, make sure you don’t remove the entries made by this or other tools.
Optimized Website Content and Google
I mentioned Google earlier, and it’s worth mentioning again. For better or worse, as website owners, we all rely on Google to be found. To be discovered. Maybe a little, or maybe quite a bit, but Google figures into our strategies somewhere.
So it’s in our interest to do anything we can to make Google see our websites in a favorable light.
Some of the things Google wants us to do (or, let’s face it, is forcing us to do) are more difficult to implement. Mobile-compatibility and HTTPS is among those guidelines. But something like file compression, as you’ve seen, is very easy.
So enable it today and start reaping the immediate benefits.
Do you compress any website content? Aside from compression, which forms of website optimization do you use?

